


Email Signatures
Your email signature is the perfect opportunity to share meaningful information that is consistent with the university’s brand.
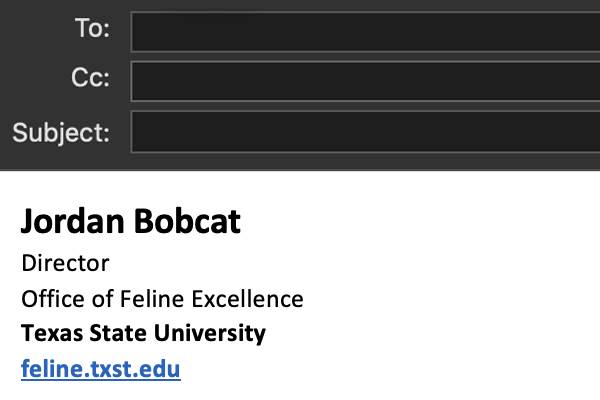
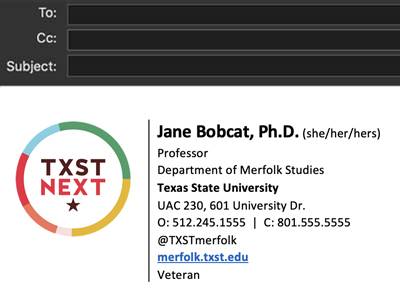
Signature Elements
Required
- Full name
- Title
- Department/school/college
- Texas State University
- Unit web address or txst.edu (linked)
Optional
- Pronouns (e.g., she/her/hers, they/them/theirs)
- Address
- Phone number(s)
- Fax
- Office Location/Hours
- Professional degrees, licenses, or certifications
- Social media handles or brand hashtags (text only, no icons)
- Veteran status, ally status, etc. (text only, no graphics)
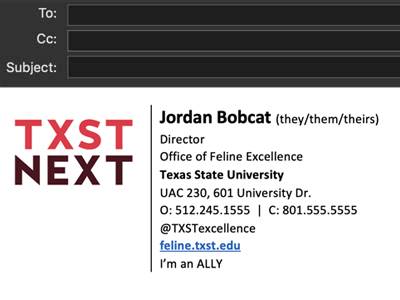
- University logo (three options, see below)
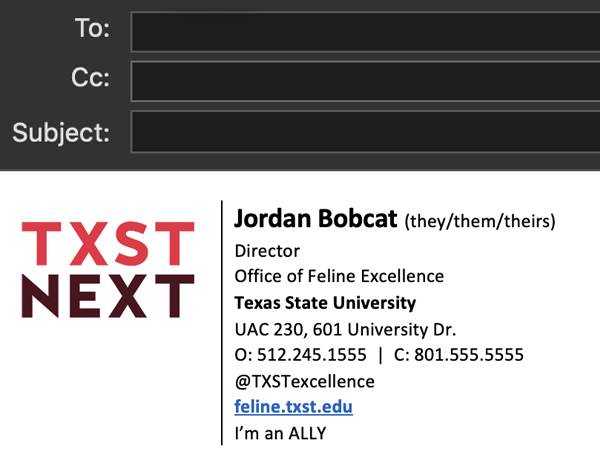
Design Options
Text only
Recommended
TXST

TXST Next
Next emblem
Text Formatting
All text, except for URLs, should be black. This is the most accessible option across devices, email clients, and dark/light modes.
- Name: Calibri Bold, 14 pt.
- Texas State University and URLs: Calibri Bold, 10 pt.
- Everything else: Calibri Regular, 10 pt.
Logo use
If you choose to include a logo, download one of the three provided options on this page. Do not use a college, division, or department logo in your email signature.
Note: Depending on the recipient’s email client and provider, images embedded into email signatures may not be supported, may display incorrectly, or may appear broken.
Step by Step Instructions
-
Outlook for Windows
Without University Logo
- In the menu bar, go to File > Options.
- Click on the Mail option.
- Click on Signatures and then New to create a signature.
- Name signature and then update it following our required signature elements and text formatting recommendations.
- Make sure to hyperlink your unit's web address.
- Click OK to save.
With University Logo
- Create a new message.
- With message window open, click on Insert > Table and create a 2x1 table.
- With your cursor in the left box of the table, click on Pictures in Navigation Bar. Choose one of the three permissible logos (downloaded from this page) and click Insert.
- Right-click on the image and select Edit Alt Text. Add either TXST or TXST Next to the alt text field, depending on which graphic you used, and click OK.
- Click and hold the middle bar of the table, then move it over until it is a quarter inch away from the logo.
- With your cursor just outside the left box of the table, click to bring up table options, click on Borders tab and then Borders and Shading.
- With the Borders and Shading tab open, unclick all the lines around the box except for the middle line. Change color from Automatic to black and click OK.
- On the right section of the table, complete your email signature with the required information and any desired optional information. Make sure you follow our text formatting recommendations.
- Copy the signature table you just created and keep the message window open.
- Follow instructions for changing your email signature noted above and paste the signature you previously created.
- Click Save and then OK.
-
Outlook for Mac
Without University Logo
- In the menu bar, go to Outlook > Preferences.
- Click on the Signatures option.
- Click Edit to create a new signature.
- A pop-up should open, allowing you to create your signature. Make sure you follow our text formatting recommendations.
- Make sure to hyperlink your unit's web address.
- Close pop-up screen to save.
With University Logo
- Follow steps 1–4 above.
- With the Signature window open, locate the Table tab and create a 2x1 table.
- With your cursor in the left box of the table, click on Pictures > Picture from File. Choose one of the three permissible logos (downloaded from this page) and click Insert.
- Right-click on the image and select Edit Alt Text. Add either TXST or TXST Next to the alt text field, depending on which graphic you used, and click OK.
- Click and hold the middle bar of the table, then move it over until it is a quarter inch away from the logo. With your cursor still on the middle bar, right click and choose the Borders and Shading option.
- With the Borders and Shading tab open, unclick all the lines around the box except for the middle line. Change color from Automatic to black and click OK.
- On the right section of the table, complete your email signature with the required information and any desired optional information. Make sure you follow our text formatting recommendations.
- Save and close window.
Simply copy and paste from the email signature template document and replace with your own information. If you continue to experience problems setting up an email signature, contact us.